This page provides guidelines for performing network captures using the SiLabs Simplicity Studio (Network Analyzer feature) software, ISA3 adapter, and MMB RapidConnect hardware. The network captures can be used to verify functionality and aid with debugging.
| Info |
|---|
The Silicon Labs ISA3 Debug Adapter is the recommended debugger when developing with EM357-based RapidConnect hardware. We recommend that a network capturing mechanism be setup before any over-the-air tests are preformed and for the capture to be left running throughout the duration of testing |
Installing Once Simplicity Studio is install you will be prompted to install the required packages. The Network Analyzer tool is supplied under the Wireless Tools package. To install, follow the steps below.
- Click on the 'Launcher' view.
- Selected 'Compatible Tools' tab.
- Click the 'Add/Remove Tools' button.
- When the Package Manager has completed loading, scroll down until you see 'Wireless Tools - 4.x.x' and install.
 Image Removed
Once the network analyzer is installed, click on the 'Tools' menu (highlighted below) to open the Network Analyzer.
 Image Removed
Open the Network Analyzer.
Click the arrow beside the gear Icon to open the 'Preferences' menu  Image Removed
 Go to the 'Device Manager' section and click 'Select All' and then 'Apply' This will ensure your adapter is found, regardless of type.  Image Removed
For the Network Analyzer to be able to detect the Ember ISA you will have to add configure the IP Address and the Subnet Mask of the ISA when configured on your network.
To add the IP information follow these steps:
- Expand the Device Manager menu and click on TCP/IP Adapters
- Ensure that the 'Scan Local Subnet' option is checked.
- Add the IP and Subnet Mask of the ISA. (127.0.0.1/255.255.255.255 is used if the ISA is connected to the PC via USB)
 Image Removed
Click 'Apply' and 'OK' once complete.
Your ISA should appear in the 'Devices' List (may have to hit the 'Refresh' button).
The following outlines the steps required to perform packet traces using a Zigbee RF device as a network sniffer.
- Start the Simplicity Studio application
- Find your device under the groups list in the Adapters tab
- Right click on your device (e.g. ember123 should match last three digits of the IP address associated with your device) and click connect. The ISA's icon will turn green to indicate that you have successfully connected.
- The ISA comes with a 10 pin debug cable that will connect to an exposed JTAG header on your RapidConnect Development Board or RapidConnect Programming Fixture.
- Connect the 10 pin cable to your device. If the device has a power supply, set the ISA target power to EXT, if the ISA is to power the device then set Target Power to INT.
- Your device should now be powered.
Captures on MMB modules can only be done if the device is a node on the network you want to capture from.
Right click on your ISA in the Simplicity Studio Adapters panel and select 'Start capture with options'.
 Image Removed
Check the 'Turn debugging Off' checkbox
 Image Removed
| Info |
|---|
It is important that this step is performed before the the device is joined to your network. Once your capture starts, you can go ahead and join the device to the network coordinator. |
- Join your device to your network. While the capture is running, the network and APS Link key will be transmitted over the air. The network capture will use these keys to decrypt frames being sent on the network.
Once your device joins the network and the network and APS Link keys are sniffed by the debugger, you will see the decrypted frames in the network capture. You will then be able to see high level network transactions, transaction events and specific event details.
 Image Removed
- Open up RapidConnect Desktop
 Image Added
- Connect as a Combined Interface Coordinator
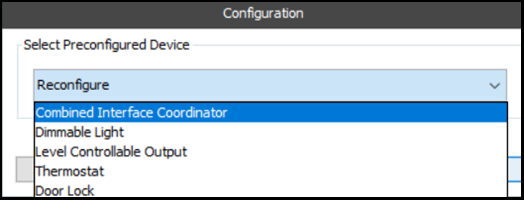 Image Added
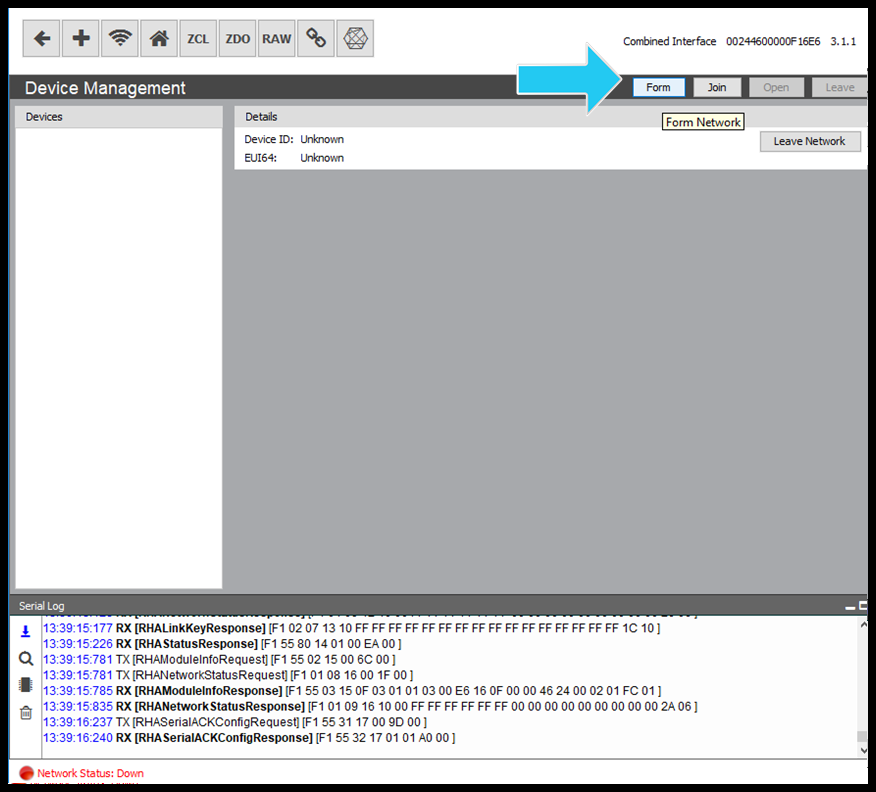 Image Added
- Open Simplicity Studios
- Find your ISA on the list
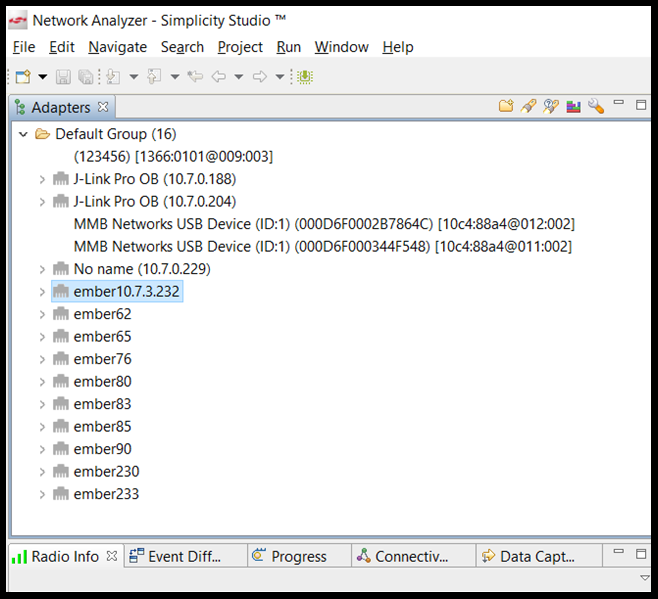 Image Added
- Right Click
- In new window select Connect
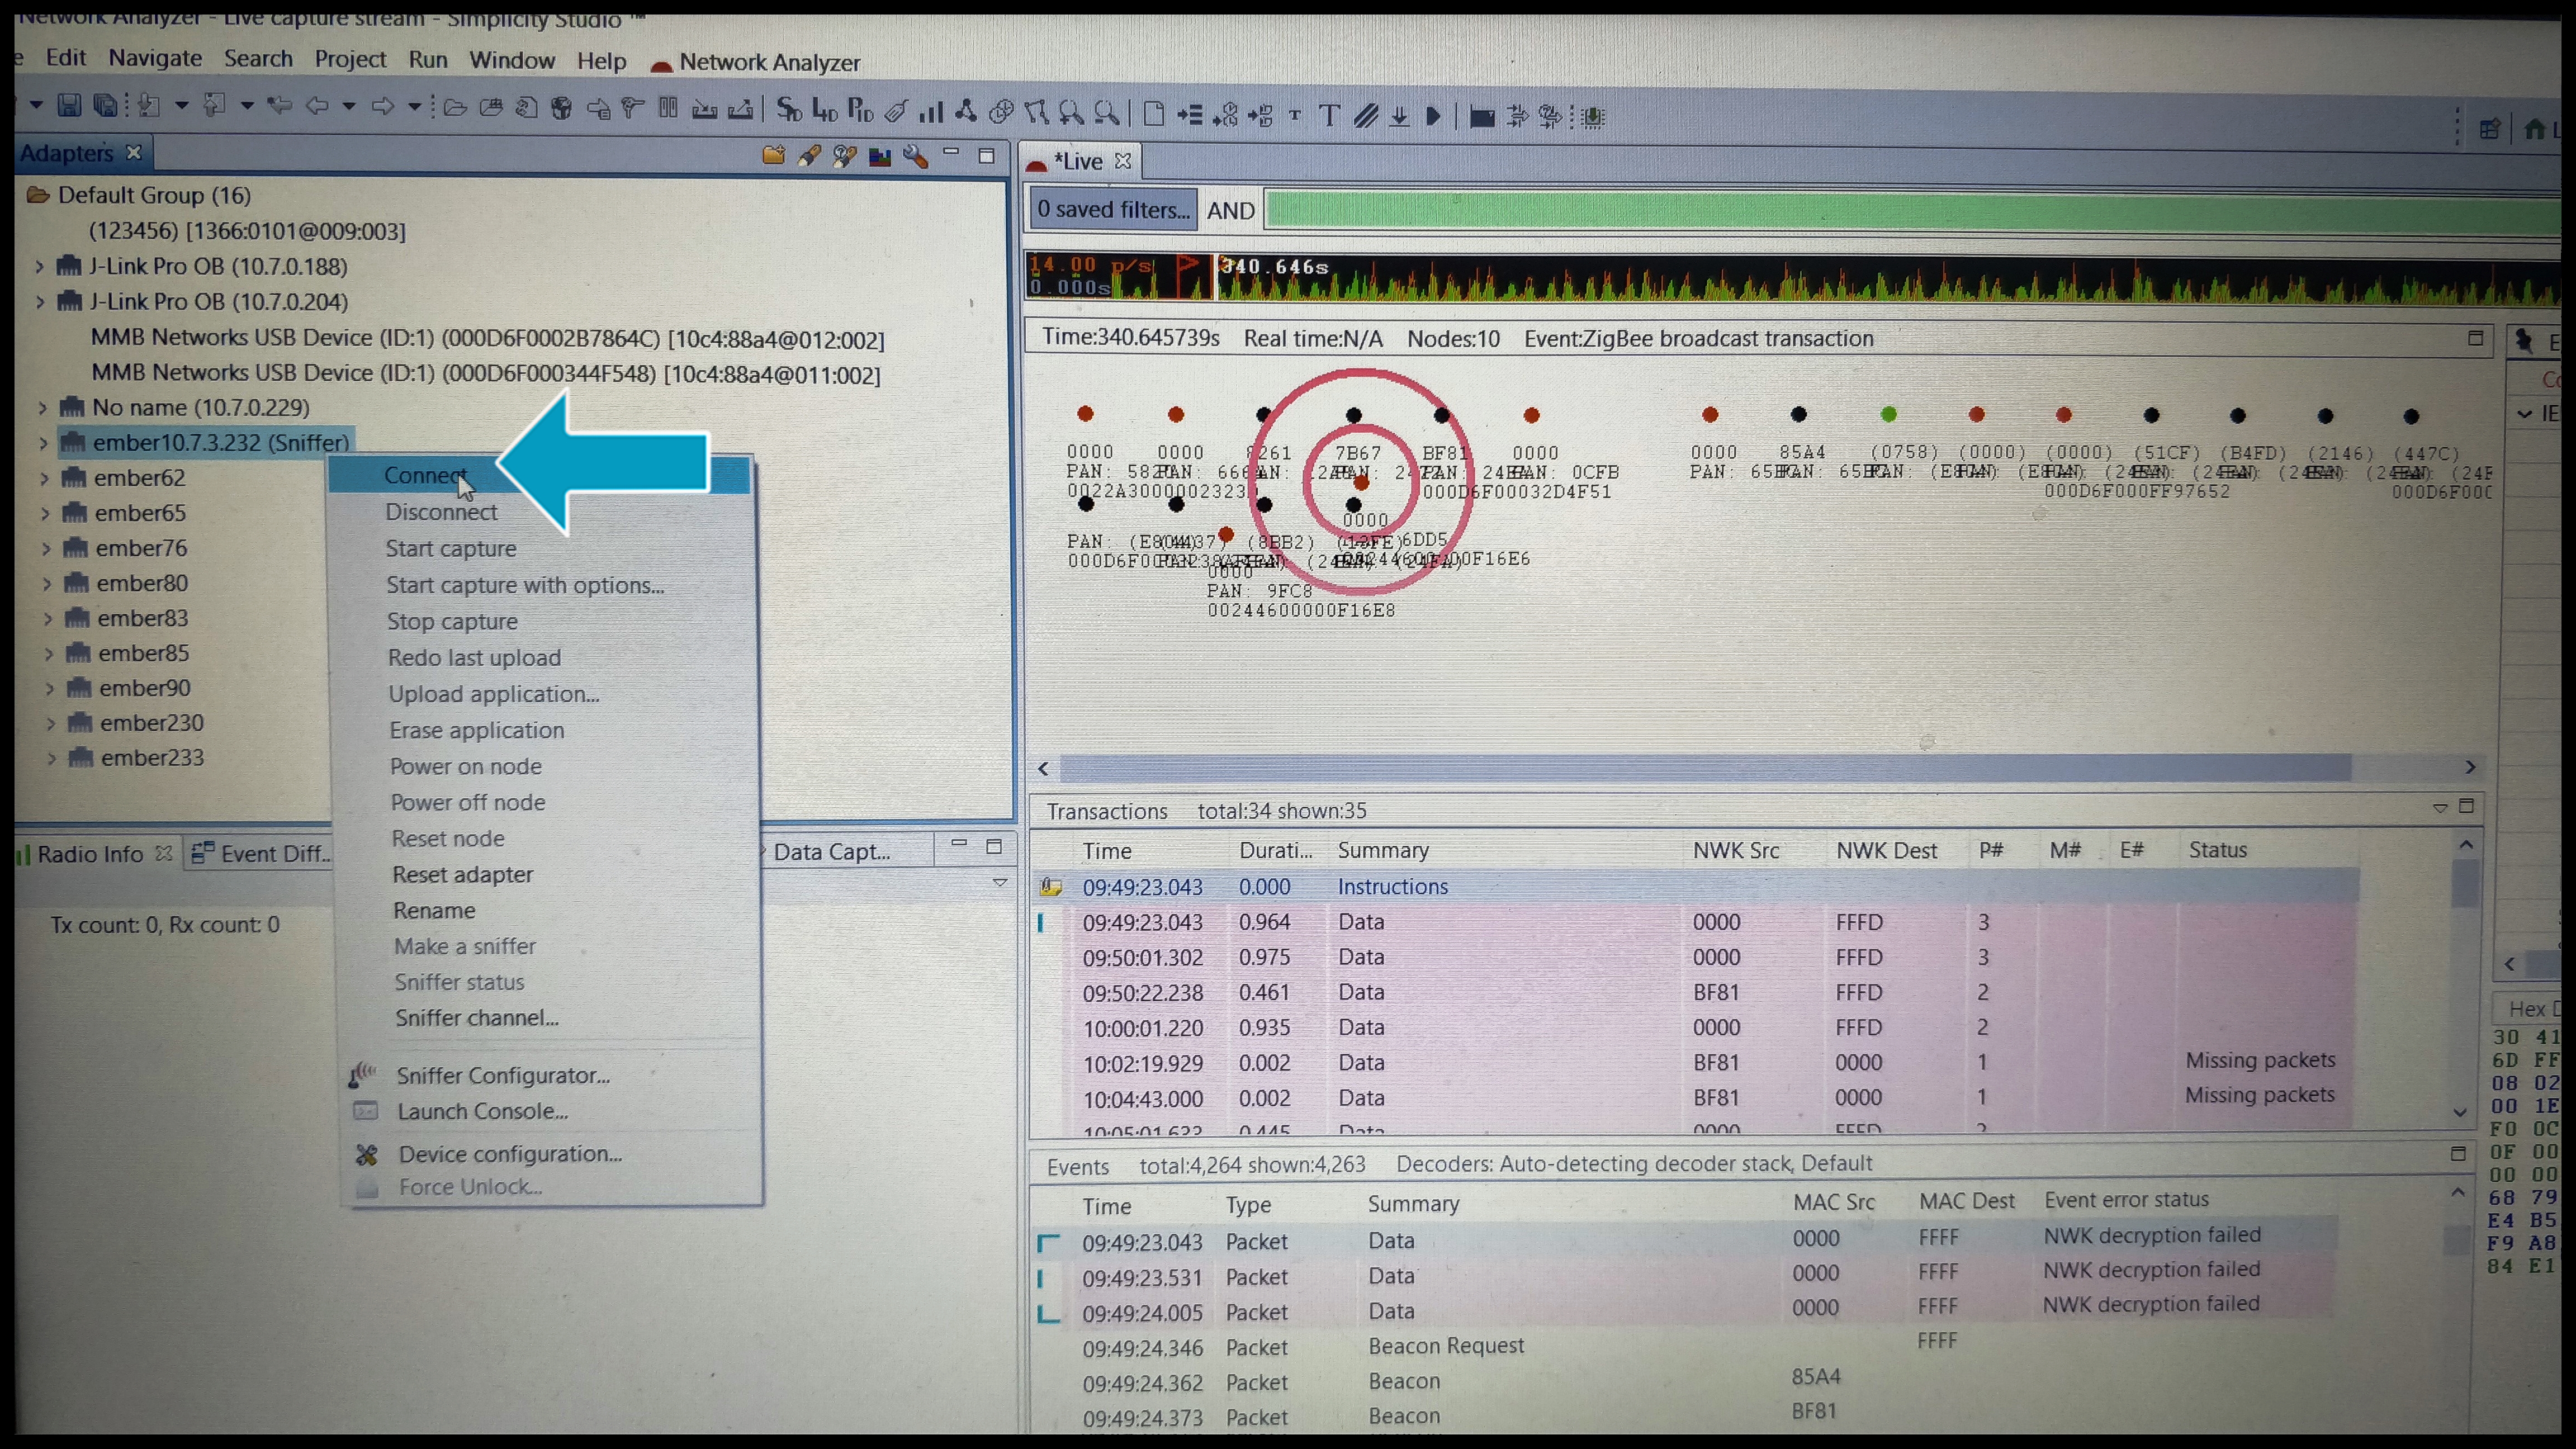 Image Added
- Right click again on your ISA a new window will open choose Start Capture
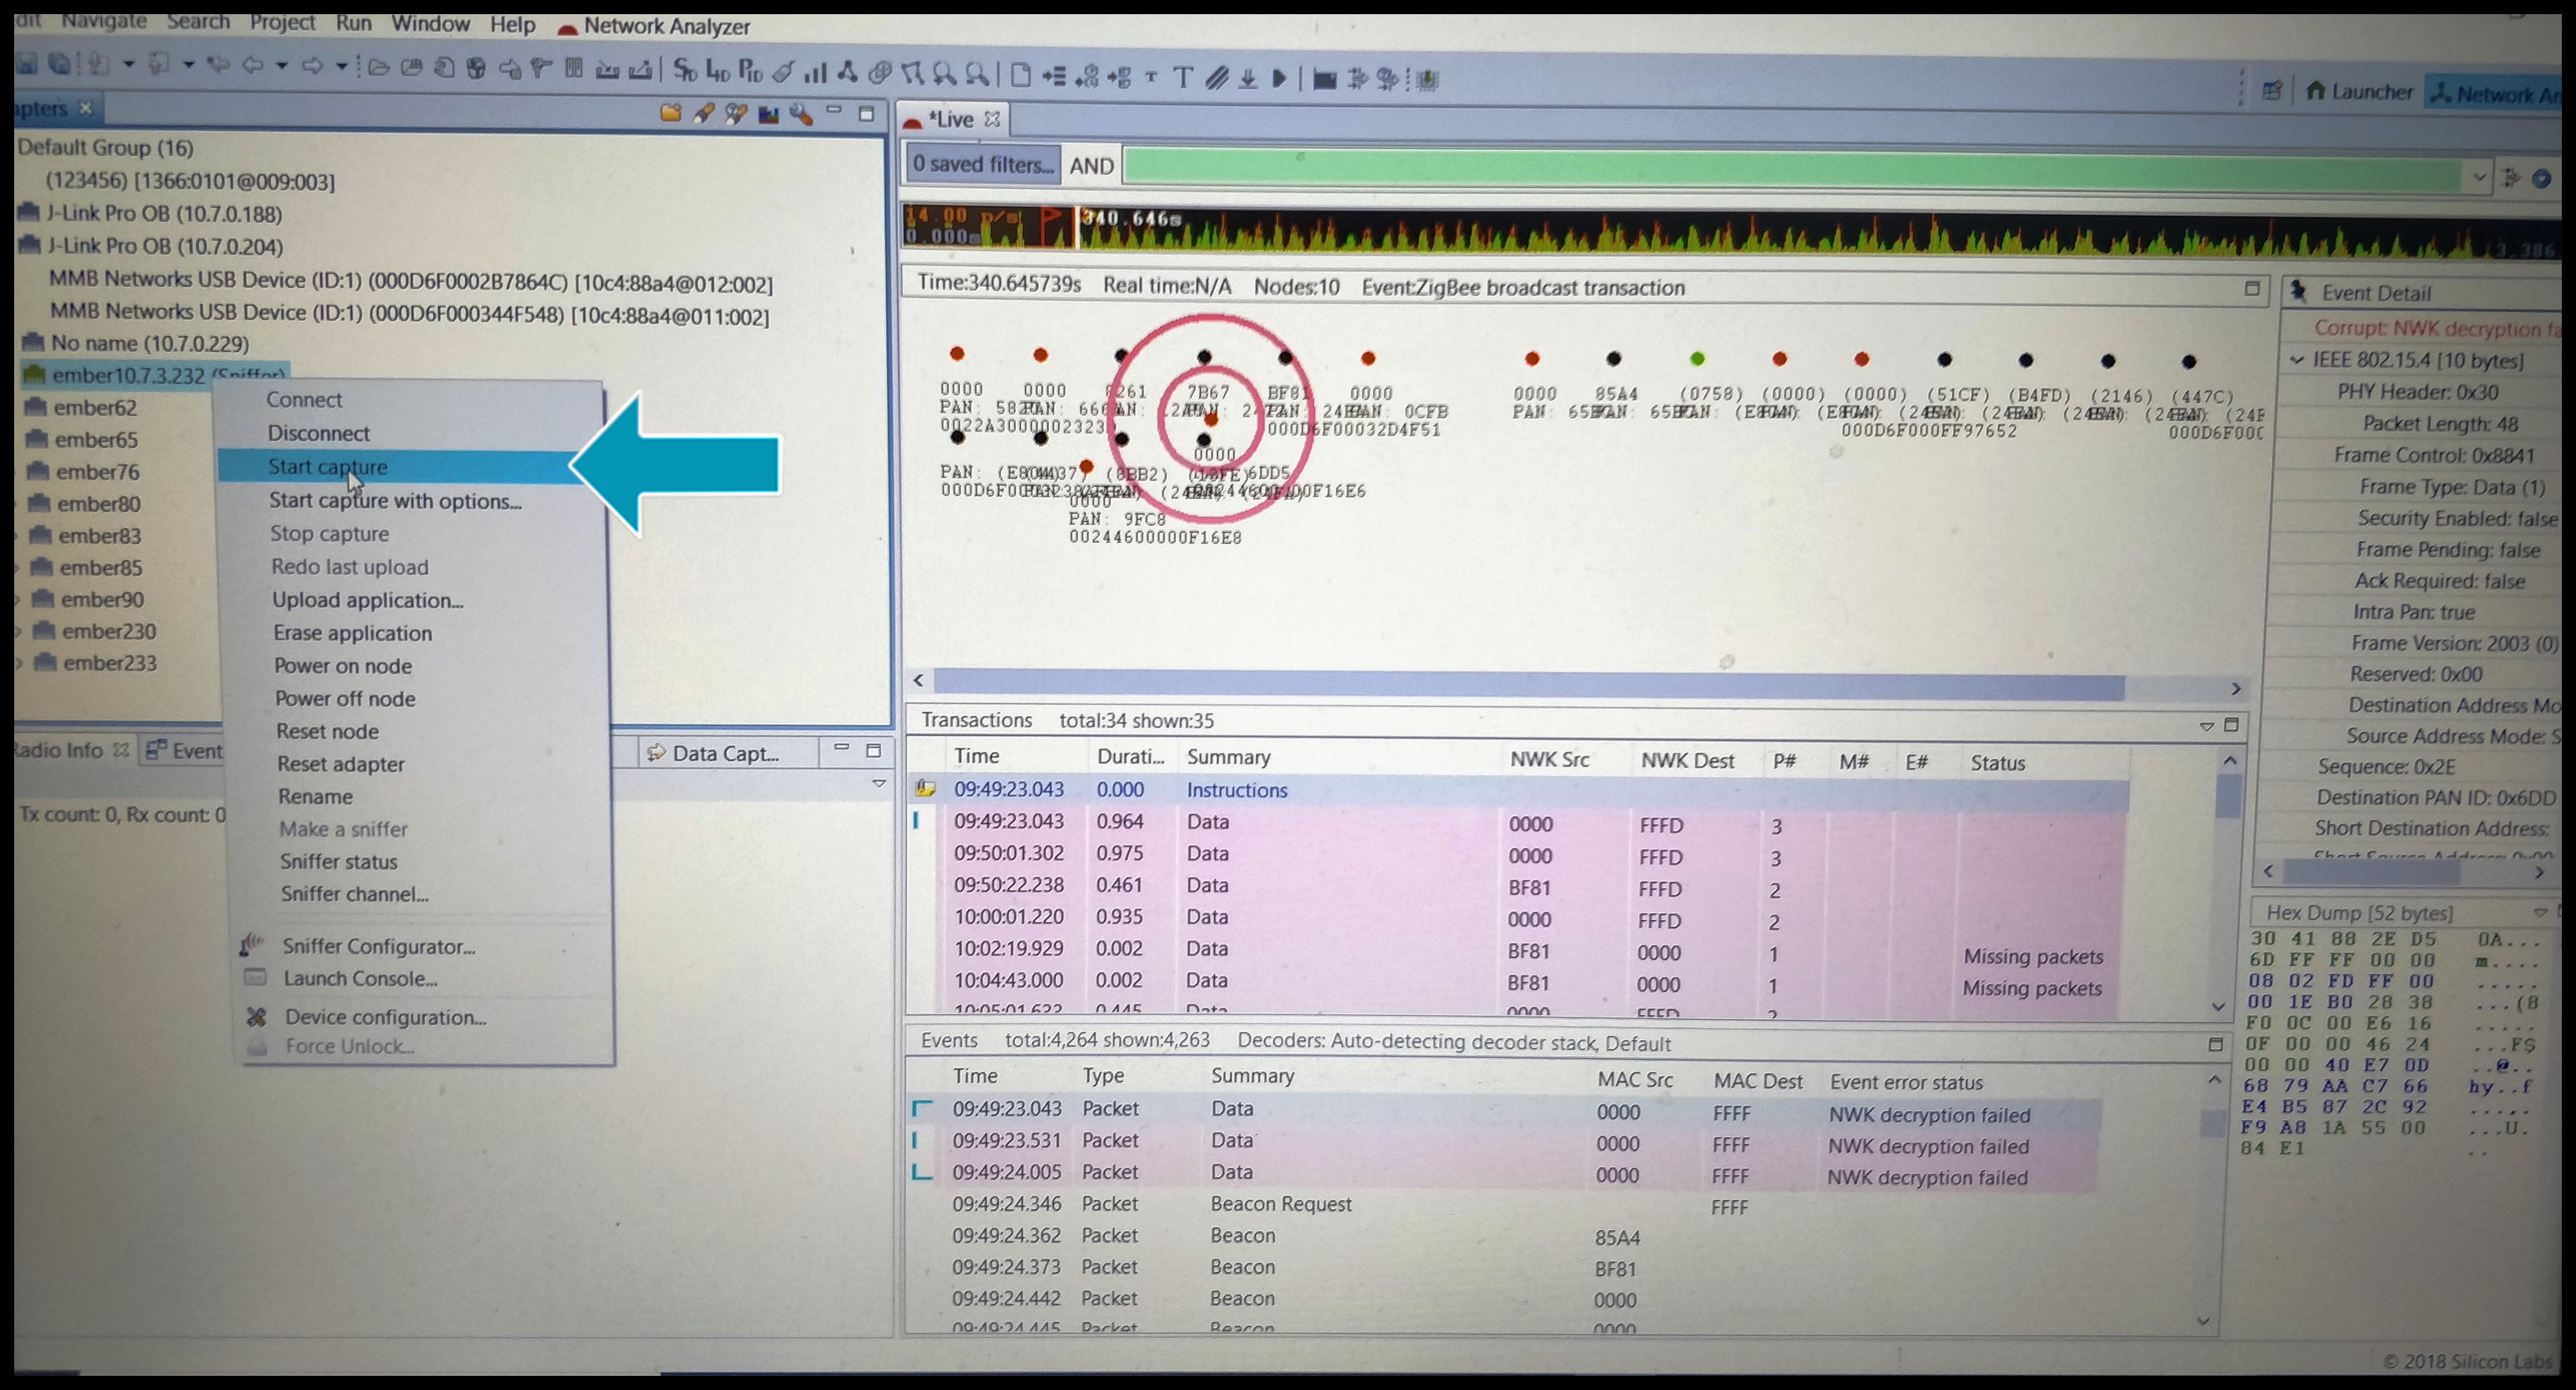 Image Added
- Now you are ready to take screen captures
- When Data comes up you want to Capture, right click on area
- Click add Bookmark
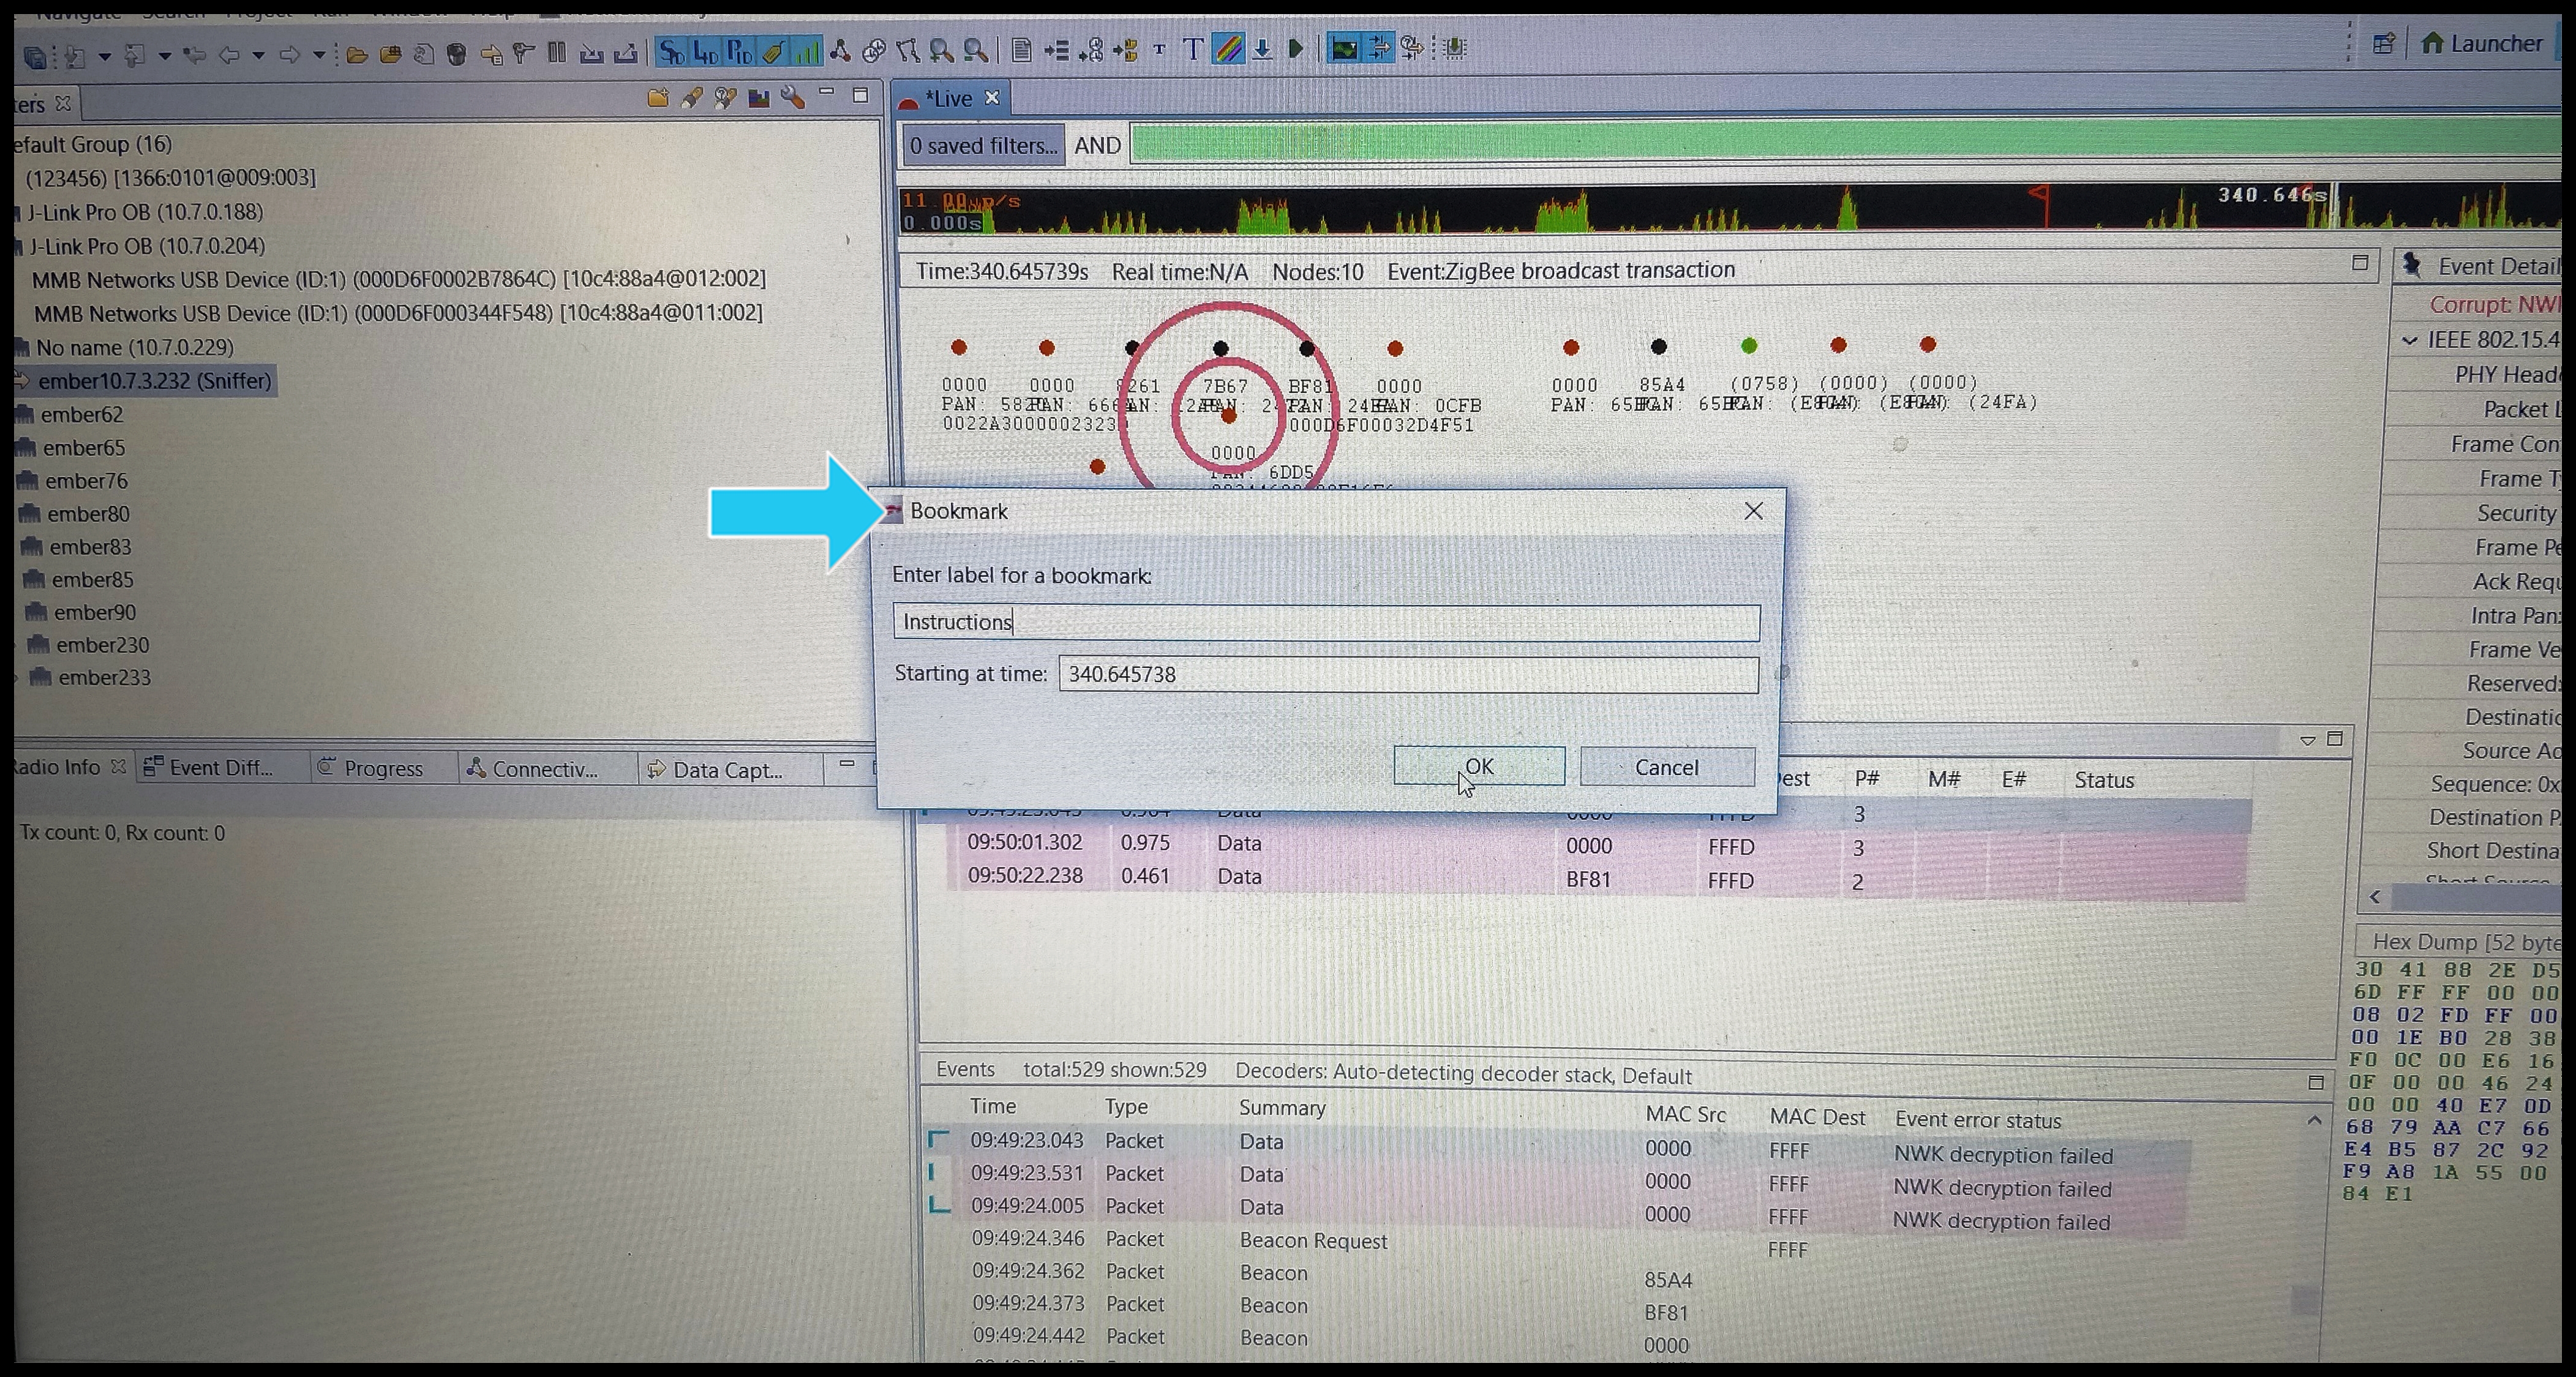 Image Added
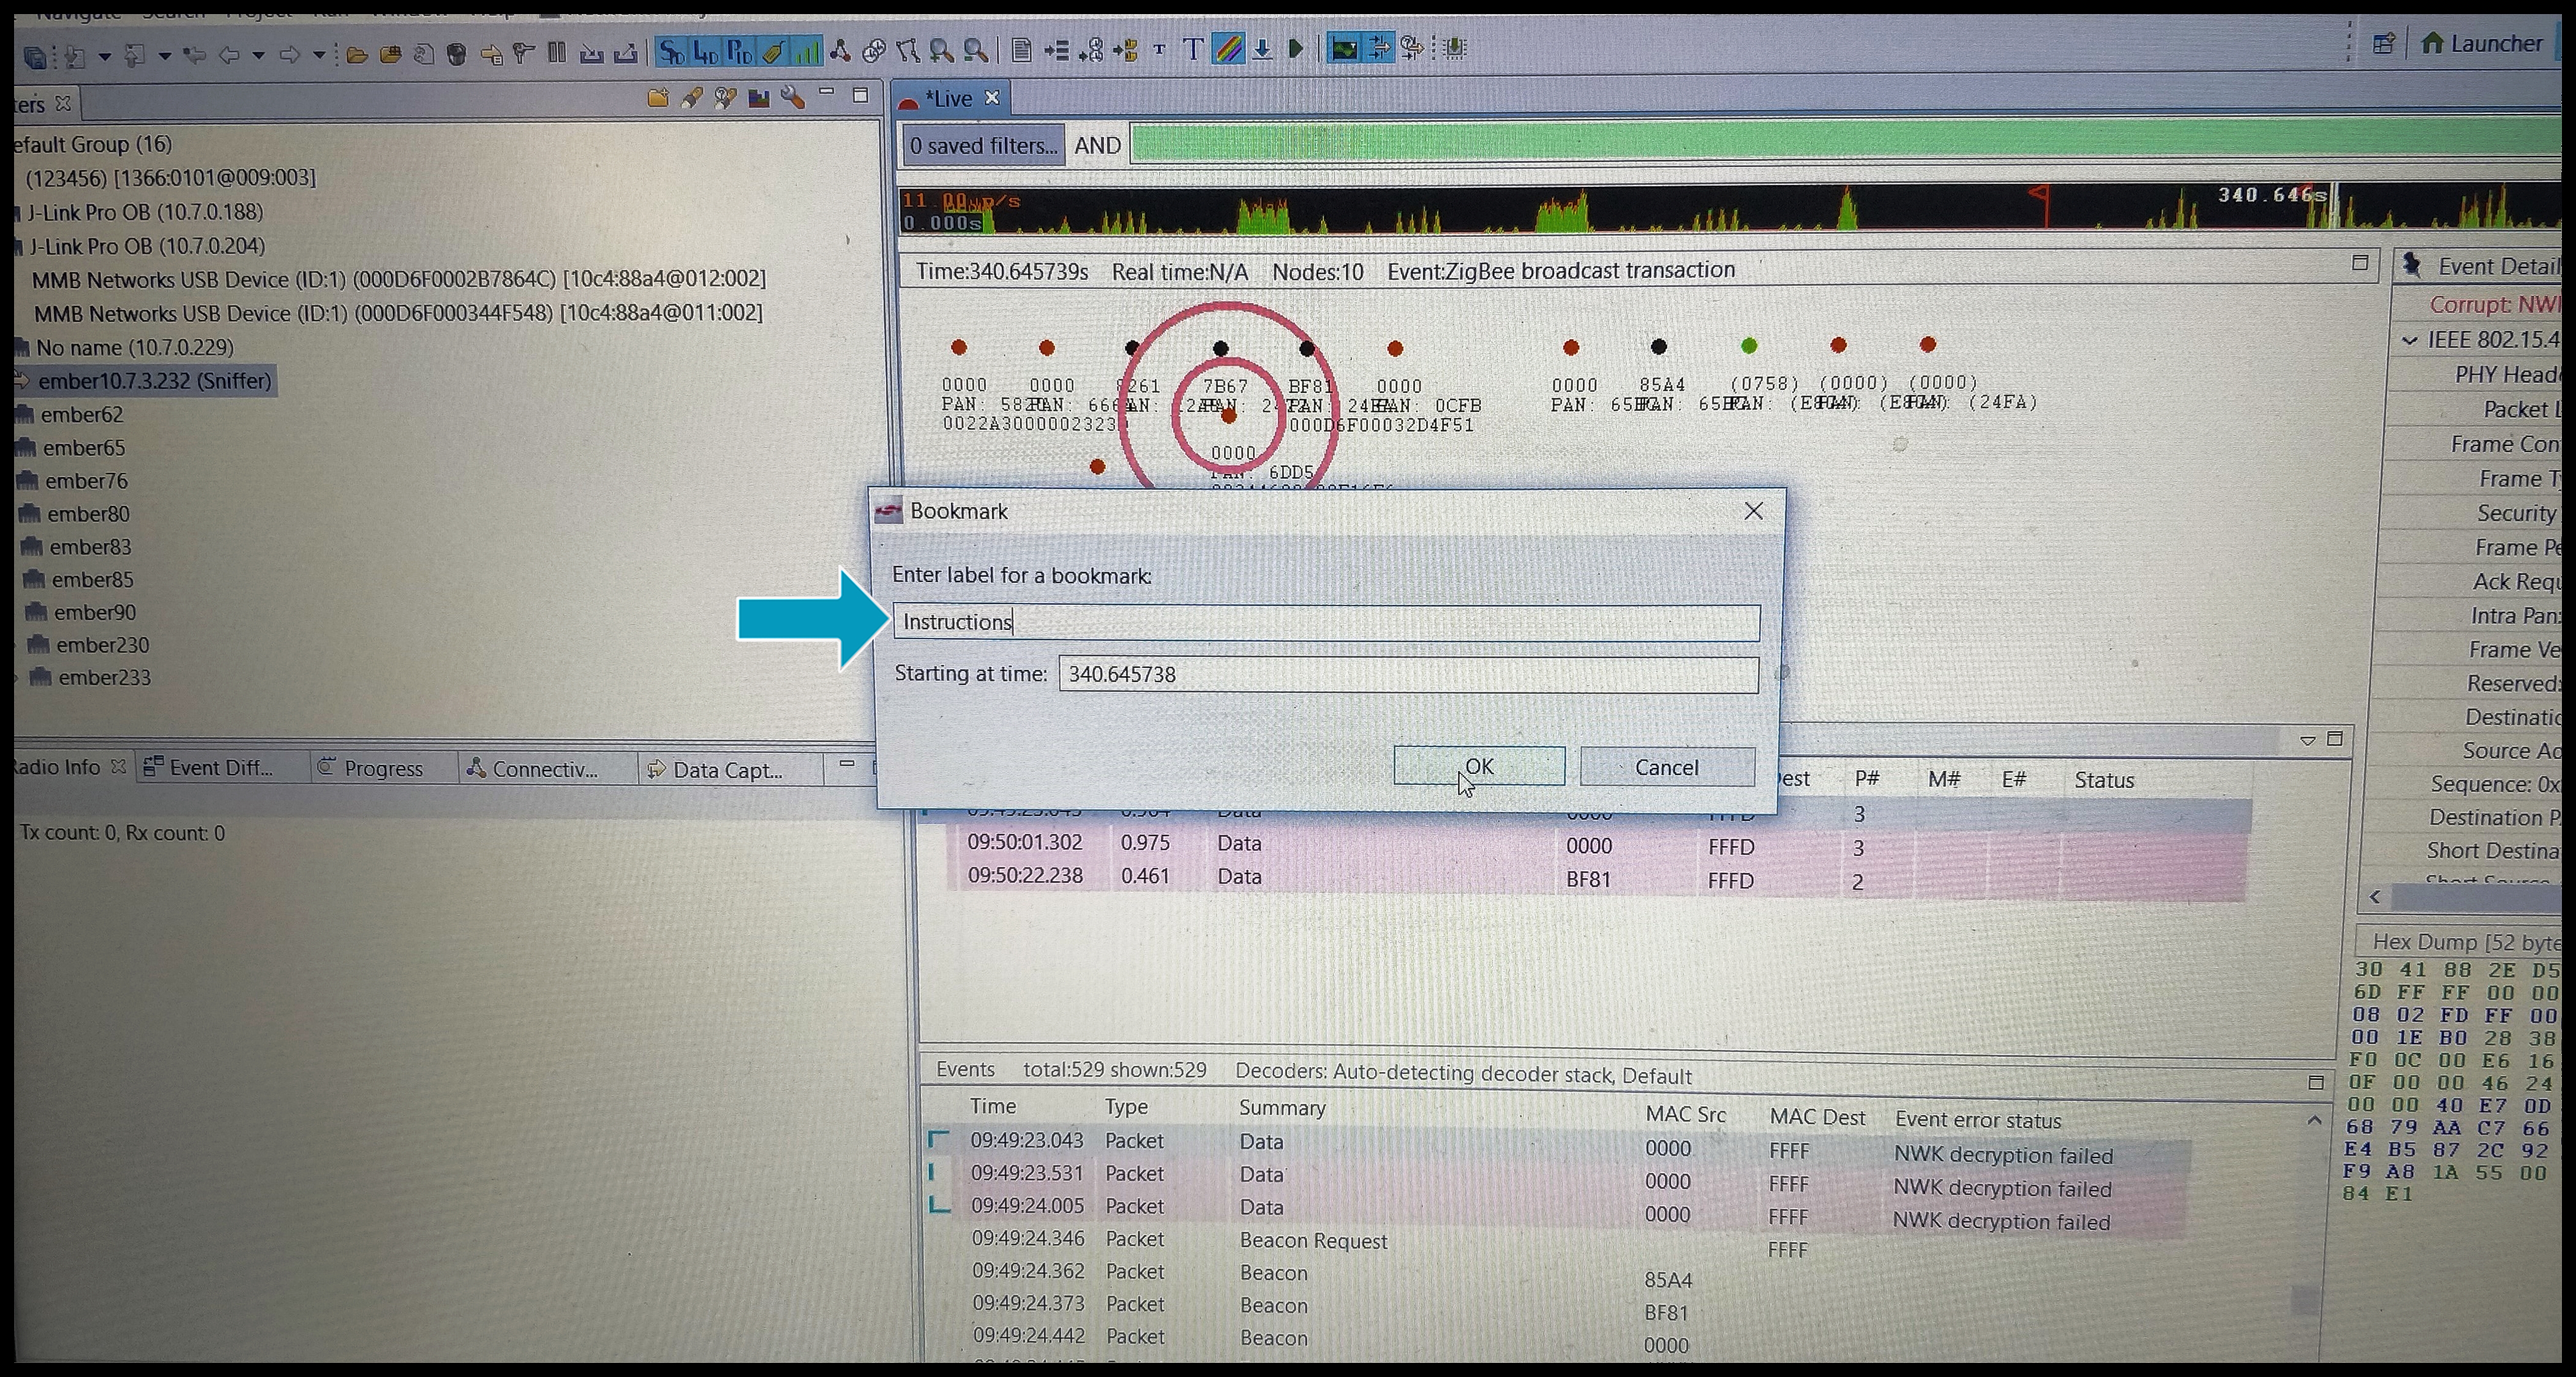 Image Added
- Go to File upper left corner
- Find save as
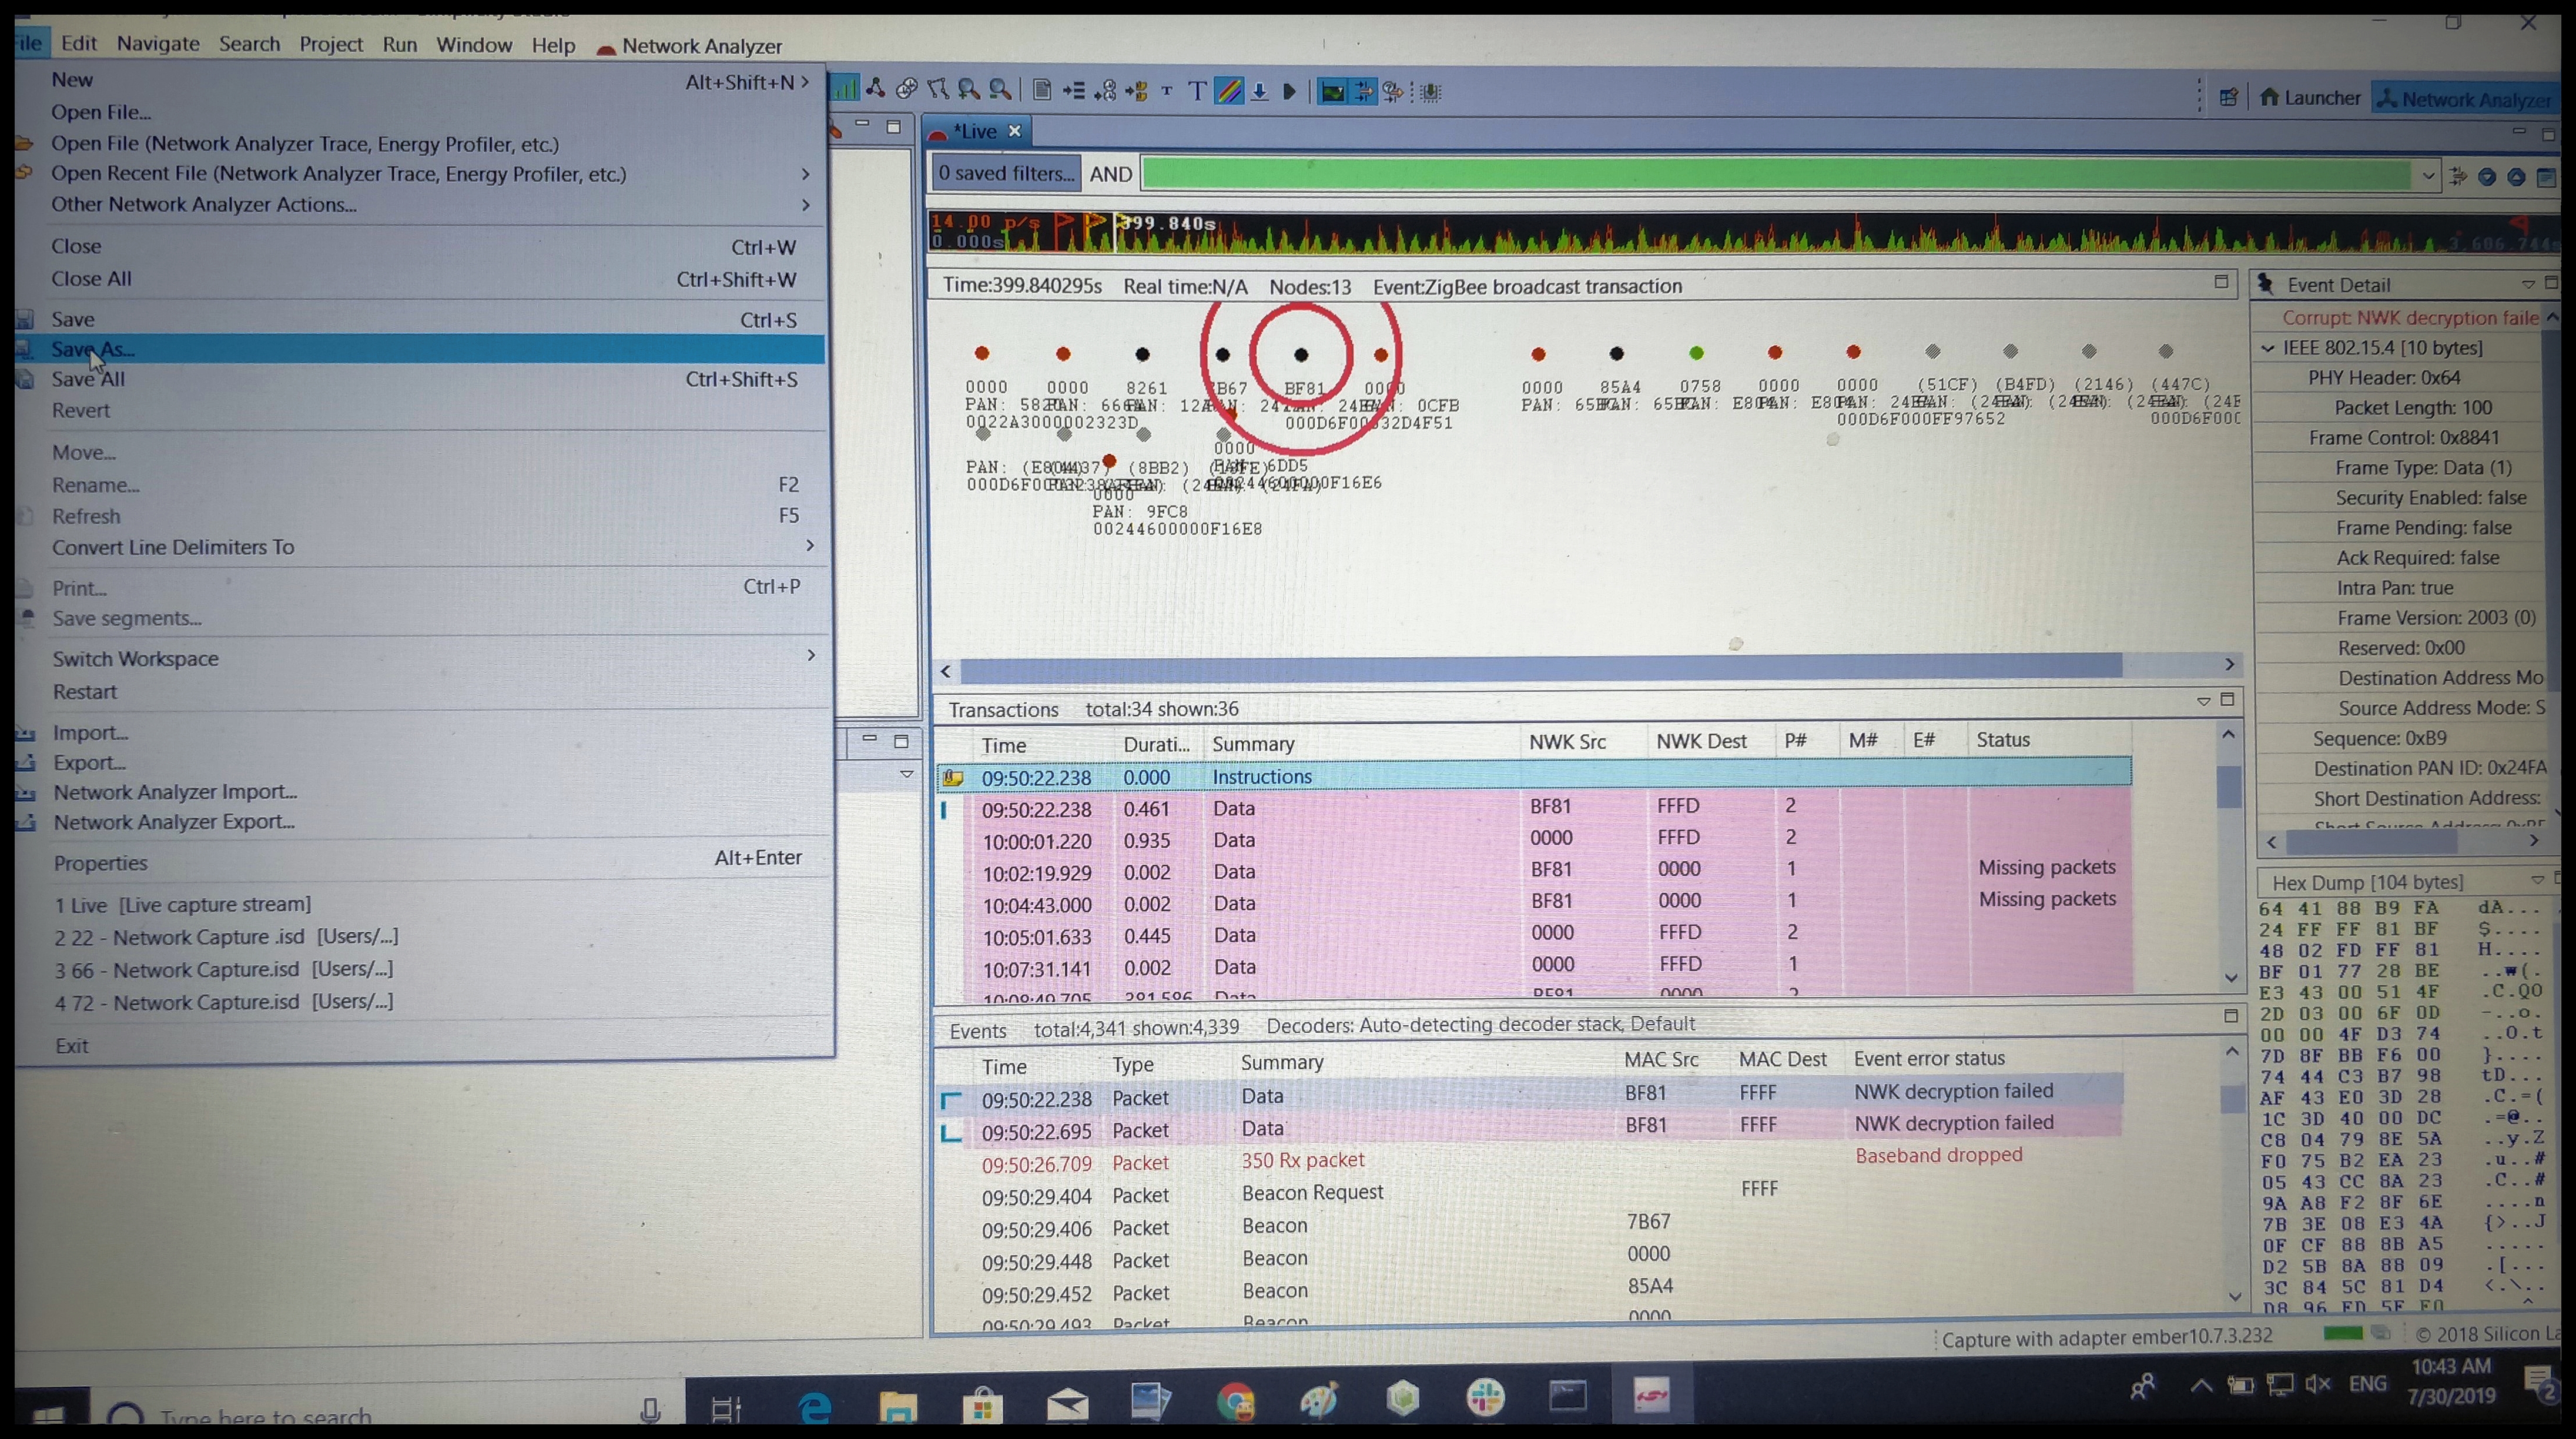 Image Added
- Choose where you want to save capture
- Make a file name ,then Save as an .ISD (InSight Desktop) file.