Overview
Cluster ID: 0x0004
The group cluster provides the capability for group addressing. That is, any endpoint on any device may be assigned to one or more groups, each labeled with a 16-bit identifier (0x0001 – 0xfff7), which acts for all intents and purposes like a network address.
Management of group membership on each device and endpoint is implemented by the APS, but the over-the-air messages that allow for remote management and commissioning of groups are defined in the cluster library.
Server-End Cluster
Each ZigBee device that implements the server-end cluster may be thought of as a group management server in the sense that it responds to information requests and configuration commands regarding the contents of its group table.
On receipt of a group cluster command, the APS will deliver the frame to each destination endpoint set in the addressing portion of the APS header and the application entity resident at that endpoint will process the command and respond as necessary.
The server-end groups cluster is capable of receiving the commands (e.g. add group, view group, remove group) sent from the client-end groups cluster.
Groups using the RapidConnect Desktop
RapidConnect Desktop provides an easy to use interface for managing groups on the server-end cluster enabled device.
For the example below, we have added the server-end cluster to our device configuration (dimmable-light). The coordinator is configured with the client-end cluster, in order to send the desired groups commands.
Pre-requisites
- Coordinator device configured with the Scenes client-end cluster & Groups client-end cluster. This step should not be required if configuring the coordinator using the supplied Coordinator.xml configuration file.
- 2 or more Dimmable Light End devices configured with the Groups server-end cluster. See here for a tutorial.
- Coordinator has formed a network and both end devices have joined.
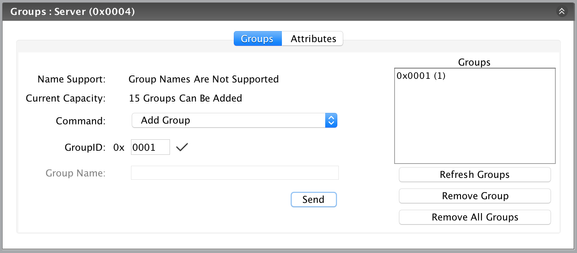
- Select a joined device from the 'Remote Devices' window and expand the Group : Server (0x0004) tab.
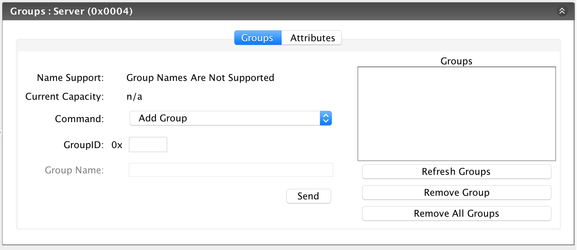
- Add a group entry to the device's group table using the interface shown above. You can add the same group ID to all devices, or add multiple group IDs to devices in order to experiment with group addressing.
Step 2: Send a command to the group
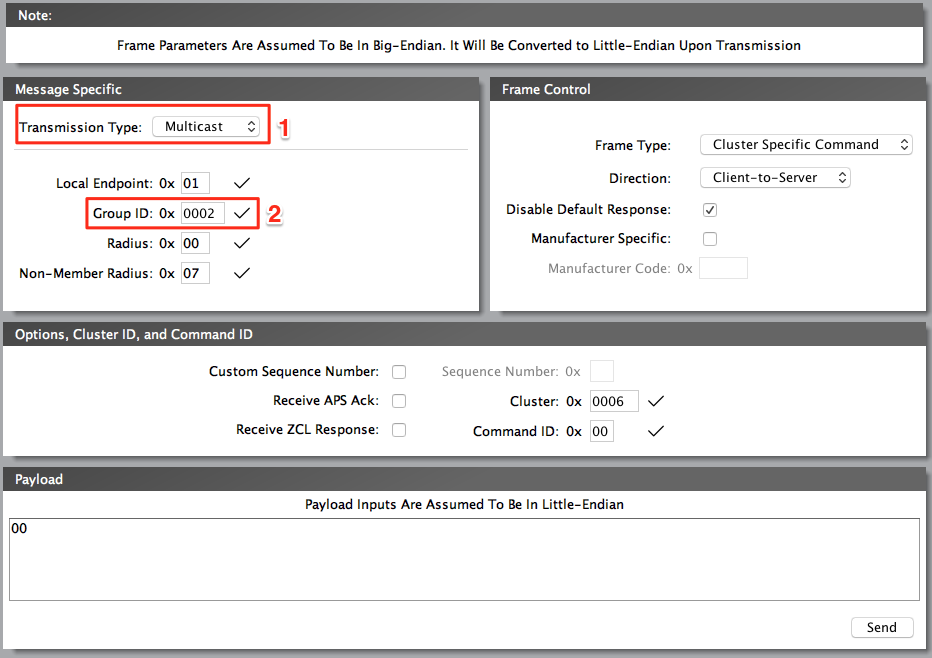
- The next step is to send a command to a 'group'. Users can do this by opening the ZCL Message window in the RapidConnect Desktop.

- Set the 'Transmission Type' to Multicast (1) in order to access group addressing. Target the desired group for the command by setting the 'Group ID' attribute (2) . In the example below, we are sending the On/Off command to Group ID 0x0002.
- You will notice that the command being sent will only affect devices in the target group.