This page describes how to use the RF Testing features in RapidConnect Desktop
Pick the Device Under Test (DUT)
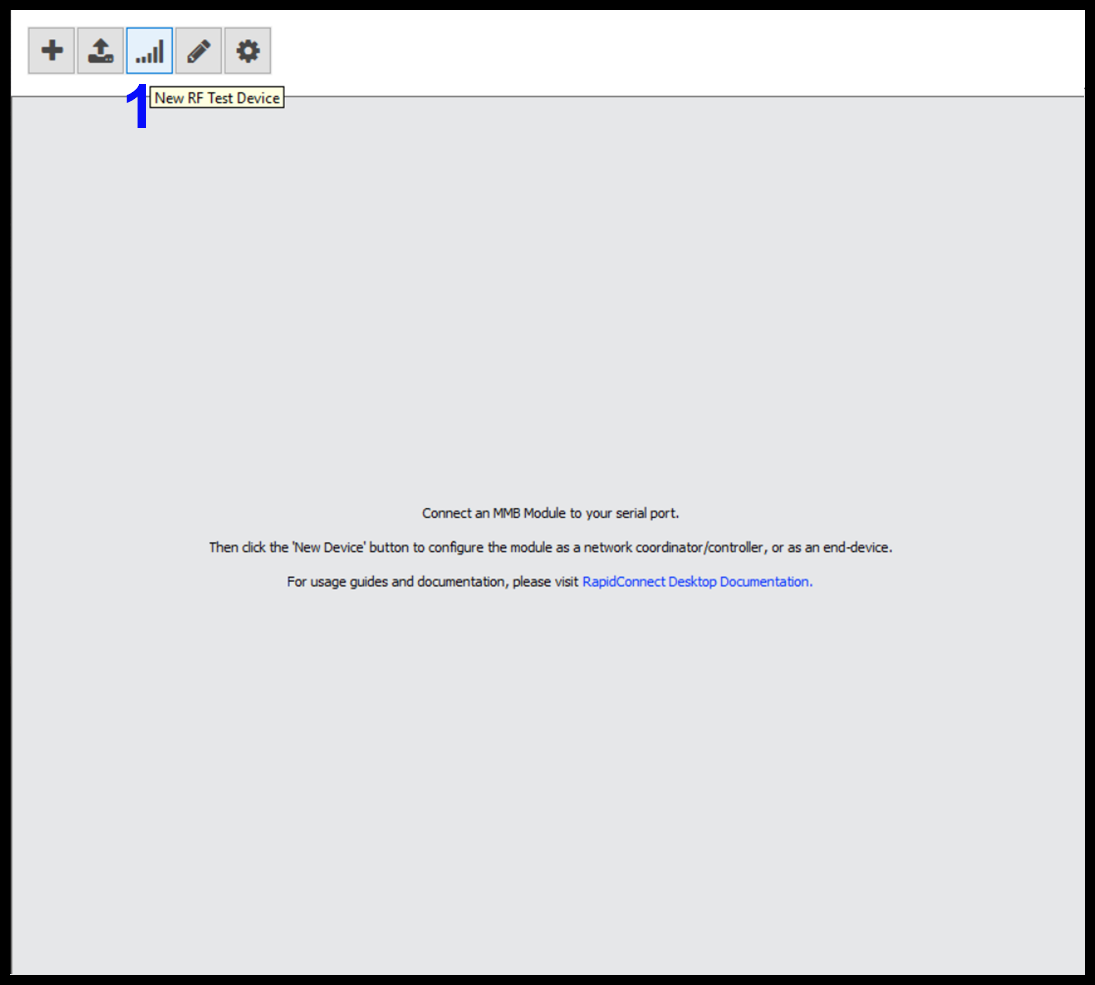
- Click the 'RF Test' button (marked as 1 in the screenshot below)
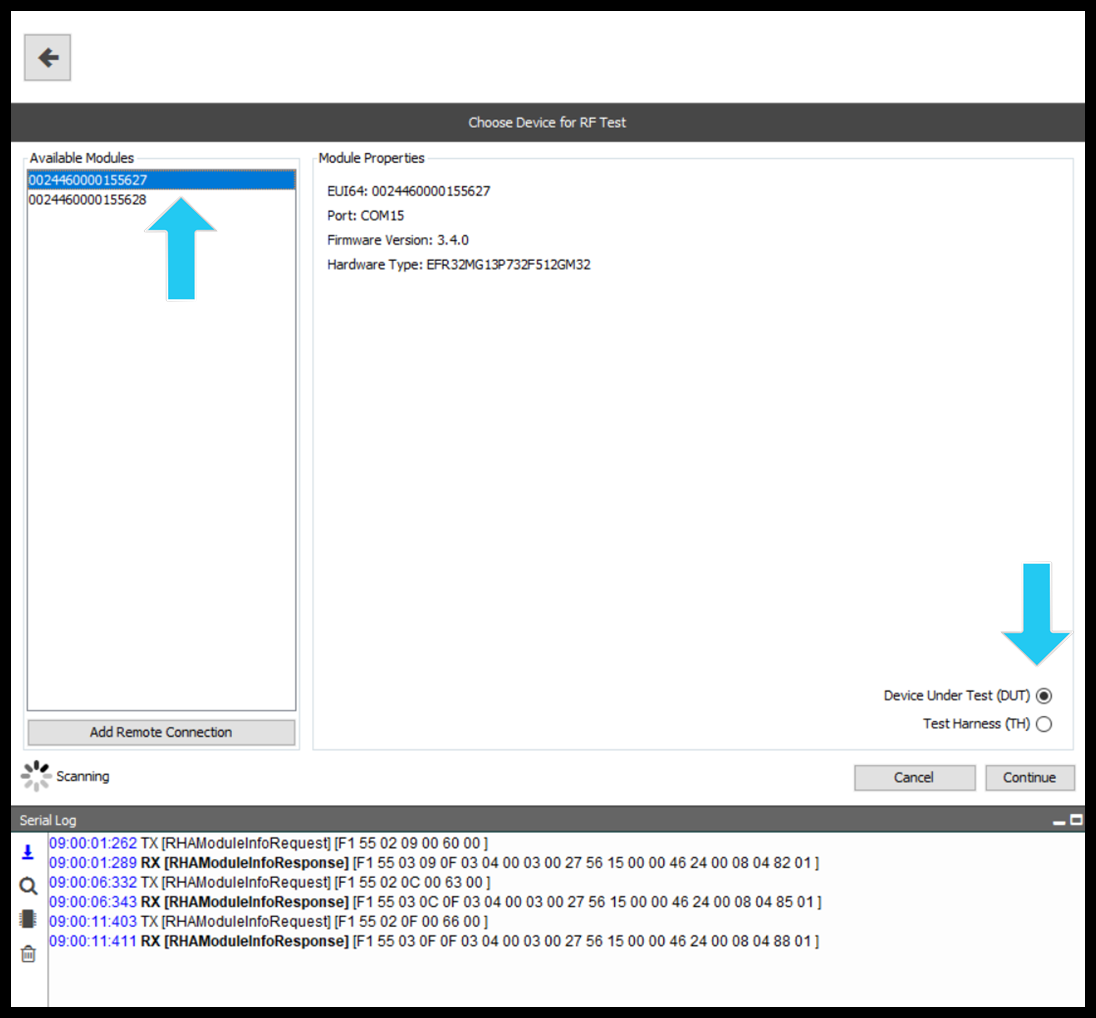
- Pick an available Module , select it as the 'Device Under Test', then click Continue
RF Testing - Tone and Stream Control
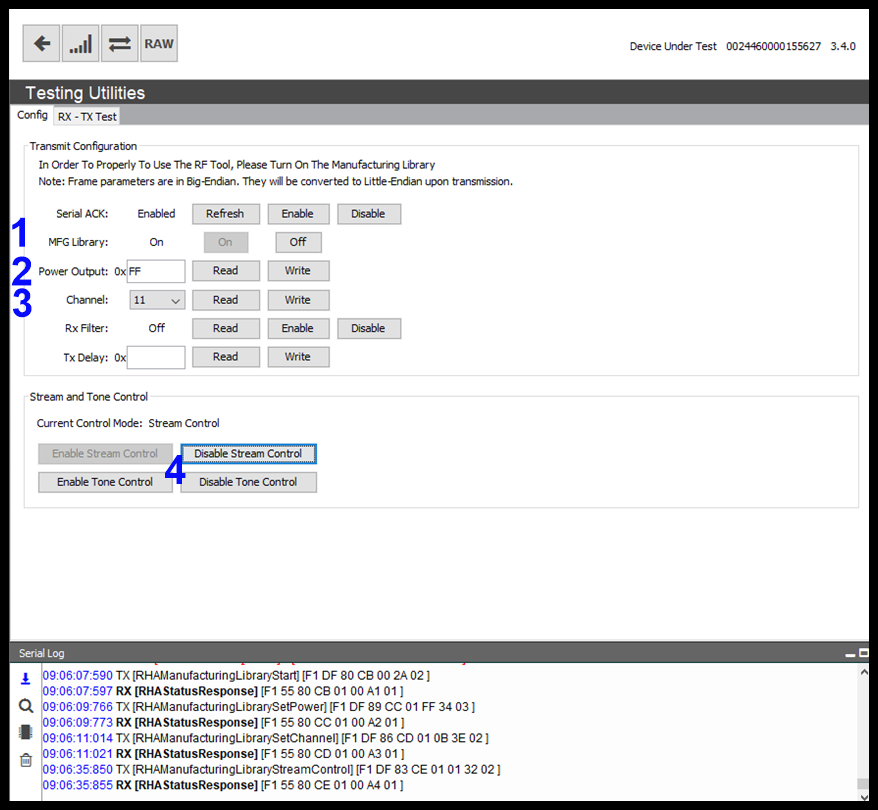
Once you have a DUT, you can instruct the radio to emit an unmodulated tone, or a random stream of modulated symbols, at a specific power level on a specified channel.
- Turn the Manufacturing Library on
- Set the Power output (0-255 or 0x00-0xFF in hex) then click 'Write' to save the value
- Set the Channel (11-26) then click 'Write to save the value
- Use the 'Enable Stream' or 'Enable Tone' buttons to have the radio emit the desired signal. Disable the Stream or Tone when done.
Pick the Test Harness (TH)
There is also a mode to test the Rx and Tx of a Module by opening another instance of RapidConnect Desktop Beta, and choosing a second device to be a Test Harness (TH).
This will allow you to send packets to the TH from the DUT to test the Tx of the DUT, and vice versa, to send packets from the TH to the DUT to test the Rx of the DUT.
- Click the 'RF Test' button to open a new instance of RapidConnect Desktop Beta (marked with arrow in screenshot below)
- Choose a device
- Select 'Test Harness' then click 'Continue'

In the second instance of RapidConnect Desktop Beta, marked as 'Test Harness' near the title bar:
- Make sure Manufacturing Library is 'On'
- Make sure the channel settings match the DUT (set it to the same channel and be sure to click 'Write').
- Make sure the DUT is not emitting a Stream or a Tone by disabling both.

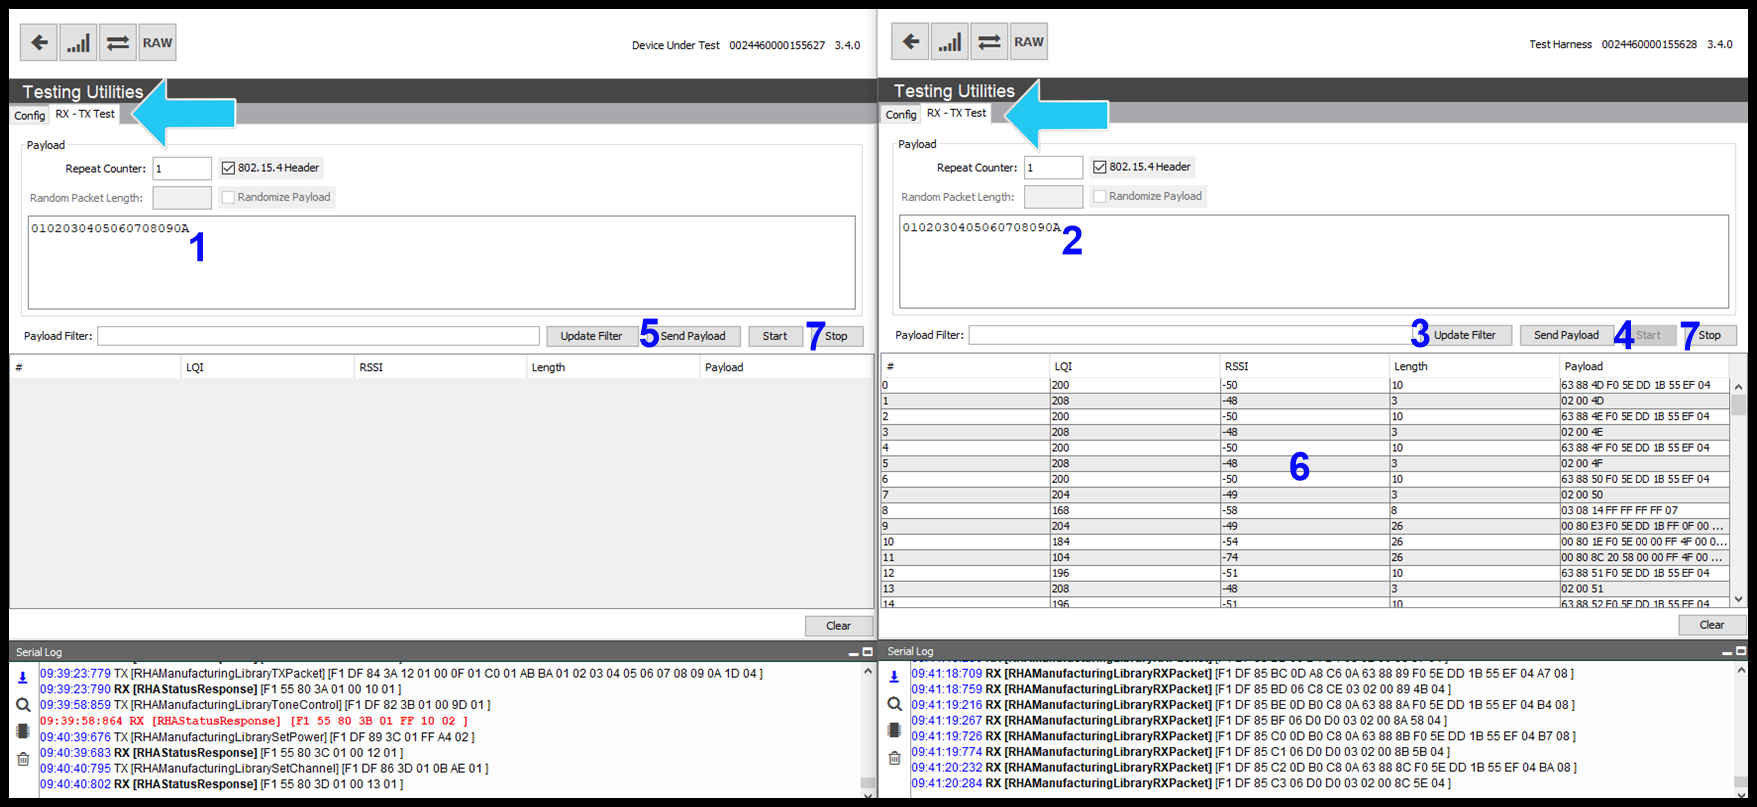
Now click the 'Rx-Tx Test' tab on both instances of the Desktop:show with blue arrow
- Enter a unique payload in the DUT Payload field
- Enter the same payload in the TH 'Payload Filter' field
- Click the 'Update Filter' button on the TH
- Click the 'Start' button on the TH to enable receiving of packets
- Click the 'Send Payload' button on the DUT to send a payload
- The table in the TH should show any packets received that match the filter. It will also show the LQI, RSSI of packets received.
- Click 'Stop' to stop displaying filtered packets.
Ending the Tests
When finished testing, make sure to turn off the Manufacturing Library on both the DUT and the TH.
You will need to go back to Config window( Marked with blue arrow below )
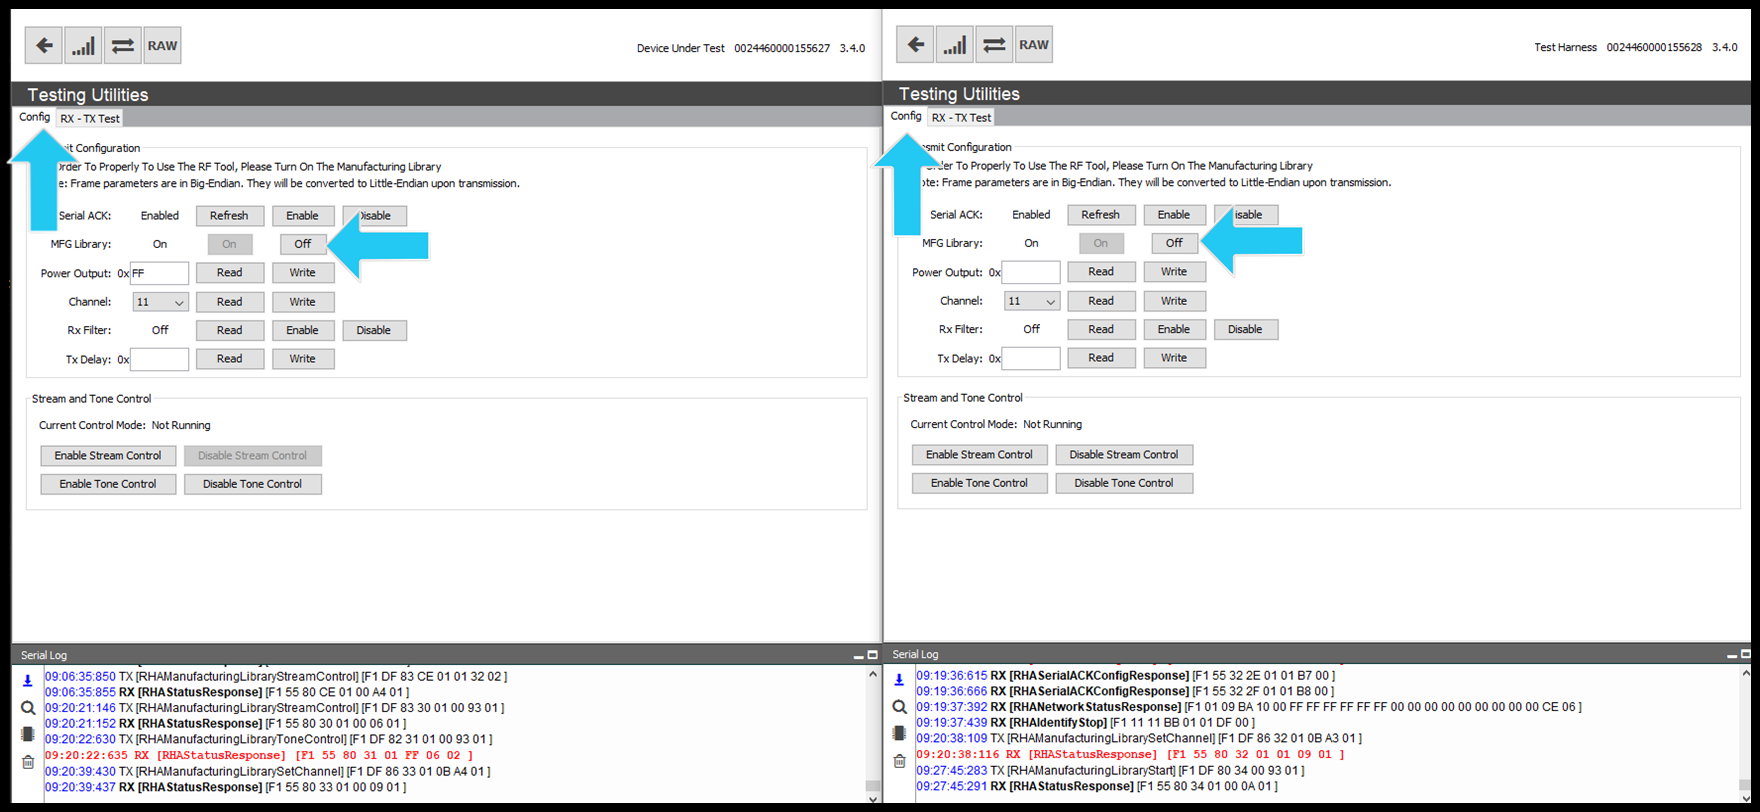
You can safely close both instances of the application.
Other Notes
Note that the above features are for test purposes only in a lab environment, and is not recommended for mass production end-of-line testing. For more information regarding how to setup mass production end-of-line testing, please contact your representative at MMB Networks.


